Difference between revisions of "Lobule Delineation"
| (19 intermediate revisions by 4 users not shown) | |||
| Line 1: | Line 1: | ||
| − | <meta name="title" content="Lobule Delineation"/> | + | <!-- <meta name="title" content="Lobule Delineation"/> --> |
| − | {{cer nav}} | + | {{cer nav|lobule=true}} |
{{h2|Painting conventions}} | {{h2|Painting conventions}} | ||
| Line 16: | Line 16: | ||
!align="left"|Lobule Name | !align="left"|Lobule Name | ||
!align="left"|Left | !align="left"|Left | ||
| − | !align="left"|Default | + | !align="left"|Default Color |
!align="left"|Vermis | !align="left"|Vermis | ||
| − | !align="left"|Default | + | !align="left"|Default Color |
!align="left"|Right | !align="left"|Right | ||
| − | !align="left"|Default | + | !align="left"|Default Color |
|- | |- | ||
| I/II || 34 ||[[image:label34.jpg]]|| - || || 12 ||[[image:label12.jpg]] | | I/II || 34 ||[[image:label34.jpg]]|| - || || 12 ||[[image:label12.jpg]] | ||
| Line 54: | Line 54: | ||
{{h2|Descriptions of All Cerebellar Lobules}} | {{h2|Descriptions of All Cerebellar Lobules}} | ||
| − | Be sure to utilize MIPAV's locking function when delineating these lobules. Try to do them in a clockwise order so that you only have to be concerned with one boundary at a time and remember to lock the background and all other labels you are not using. When delineating save a file of masks without the delineation for the middle vermis. | + | Be sure to utilize MIPAV's locking function when delineating these lobules. Try to do them in a clockwise order so that you only have to be concerned with one boundary at a time; and remember to lock the background, and all other labels you are not using. When delineating, save a file of masks without the delineation for the middle vermis. |
The following pages contain various lobule screen shots. These screen shots were taken at different sections of the cerebellem in no particular sequence. | The following pages contain various lobule screen shots. These screen shots were taken at different sections of the cerebellem in no particular sequence. | ||
| Line 60: | Line 60: | ||
{{h3|Lobules I/II}} | {{h3|Lobules I/II}} | ||
| − | Click [[ | + | Click [[Lobules I/II|HERE]] for more information. |
| − | *Location: Within 10-12 slices to the left and right of the mid-sagittal in the mid horizontal region | + | *Location: Within 10-12 slices to the left and right of the mid-sagittal in the mid horizontal region |
| − | *Description: | + | *Description: It is a very thin hair like lobule, best identified in the sagittal orientation as seen below. It is the small thin curve of grey matter bordering the superior cerebellar peduncles and nearly touching the spinal cord. |
<gallery widths="500" heights="300"> | <gallery widths="500" heights="300"> | ||
| Line 74: | Line 74: | ||
{{h3|Lobule III}} | {{h3|Lobule III}} | ||
| − | Click [[ | + | Click [[Lobule III|HERE]] for more information. |
| − | *Location: Anterior region of the cerebellum towards the top surface | + | *Location: Anterior region of the cerebellum towards the top surface |
| − | *Description: | + | *Description: It is the first fully visible lobule going clockwise (as shown below), best located in the midsagittal region. |
*This lobule usually consists of only one major white matter branch and often ends near the boundaries of the spinal cord. | *This lobule usually consists of only one major white matter branch and often ends near the boundaries of the spinal cord. | ||
| Line 90: | Line 90: | ||
{{h3|Lobule IV}} | {{h3|Lobule IV}} | ||
| − | Click [[ | + | Click [[Lobule IV|HERE]] for more information. |
*Location: Top portion of the cerebellum, focused around the midline | *Location: Top portion of the cerebellum, focused around the midline | ||
| − | *Description: | + | *Description: It can first be identified in the midsagittal slice, as the lobule to the left (inwards) of the top most vertical fissure. |
| − | *It is bounded on one side by lobule III. On the other the boundary is the most prominent fissure between | + | *It is bounded on one side by lobule III. On the other the boundary is the most prominent fissure between lobule III and the primary fissure. |
<gallery widths="500" heights="300"> | <gallery widths="500" heights="300"> | ||
| Line 105: | Line 105: | ||
{{h3|Lobule V}} | {{h3|Lobule V}} | ||
| − | Click [[ | + | Click [[Lobule V|HERE]] for more information. |
*Location: Top portion of the cerebellum, focused mainly around the midline | *Location: Top portion of the cerebellum, focused mainly around the midline | ||
| − | *Description: Can first be identified in the midsagittal slice, as the lobule to the right (outwards) of the top most fissure | + | *Description: Can first be identified in the midsagittal slice, as the lobule to the right (outwards) of the top most fissure. |
| − | *If you have already defined the primary fissure (Lobe Definitions) and lobule IV then this definition should be trivial. | + | *If you have already defined the primary fissure ([[Iacl:Lobe_Definitions|Lobe Definitions]]) and lobule IV then this definition should be trivial. |
<gallery widths="500" heights="300"> | <gallery widths="500" heights="300"> | ||
| Line 120: | Line 120: | ||
{{h3|Lobule VI}} | {{h3|Lobule VI}} | ||
| − | Click [[ | + | Click [[Lobule VI|HERE]] for more information. |
*Location: Spans almost entire cerebellum, except the far lateral sides | *Location: Spans almost entire cerebellum, except the far lateral sides | ||
| − | *Description: One boundary is easily identifiable in the midsagittal region as there is a clear, wide fissure separating lobules V and VI | + | *Description: One boundary is easily identifiable in the midsagittal region as there is a clear, wide fissure separating lobules V and VI (this should already be defined). |
| − | *On the other side it is bounded by VIIAf and VIIAt. The best way to see this boundary is | + | *On the other side it is bounded by VIIAf and VIIAt. The best way to see this boundary is to begin at the mid-line of the sagittal view and travel laterally about 15mm. You should see lobule VIIAf, which is not usually present in the midline grow in prominence. This is the second boundary for lobule VI and can be followed laterally in the sagittal view. When delineating the mid line maintain the already established anatomical boundary. |
<gallery widths="500" heights="300"> | <gallery widths="500" heights="300"> | ||
| Line 134: | Line 134: | ||
| − | {{h3|Lobule | + | {{h3|Lobule VIIAf - Crus I}} |
| + | |||
| + | Click [[Lobule VIIAf|HERE]] for more information. | ||
| + | |||
| + | |||
*Location: Spans entire cerebellum except for a few slices around the midsagittal | *Location: Spans entire cerebellum except for a few slices around the midsagittal | ||
| − | *Description: | + | *Description: It is best to initially identify from the most lateral edges (Figure 53) and the most posterior axial slice. |
| − | **Notice how this lobule is not in the midsagittal slice | + | **Notice how this lobule is not in the midsagittal slice |
*This lobule can also be identified in the sagittal plane as the lobule that is not present at the mid-line but becomes easily discernible roughly 15 mm from the mid-line. It is usually one branch at first that may become two or more at the lateral edges. It should dominate the lateral portion of the cerebellum. | *This lobule can also be identified in the sagittal plane as the lobule that is not present at the mid-line but becomes easily discernible roughly 15 mm from the mid-line. It is usually one branch at first that may become two or more at the lateral edges. It should dominate the lateral portion of the cerebellum. | ||
| Line 148: | Line 152: | ||
{{h3|Lobule VIIAt - Crus II}} | {{h3|Lobule VIIAt - Crus II}} | ||
| + | |||
| + | Click [[Lobule VIIAt|HERE]] for more information. | ||
| + | |||
| + | |||
*Location: Spans entire cerebellum about middle of the sagittal orientation | *Location: Spans entire cerebellum about middle of the sagittal orientation | ||
| − | *Description: This lobule can first be identified and painted in the midsagittal and then the paint can be propagated laterally, can also be seen in the posterior axial slices | + | *Description: This lobule can first be identified and painted in the midsagittal and then the paint can be propagated laterally, it can also be seen in the posterior axial slices. |
| − | **In the midsagittal region, there is an easy to define fissure separating this lobule and Lobule VIIIA | + | **In the midsagittal region, there is an easy to define fissure separating this lobule and Lobule VIIIA. |
*This fissure is primarily defined by the most dominate fissure between VIIAf and the prebiventure fissure, however determining which fissure qualifies can be difficult. Be patient and consider all perspectives and relavent regions of the scan in order to make the best decision possible. | *This fissure is primarily defined by the most dominate fissure between VIIAf and the prebiventure fissure, however determining which fissure qualifies can be difficult. Be patient and consider all perspectives and relavent regions of the scan in order to make the best decision possible. | ||
| Line 159: | Line 167: | ||
{{h3|Lobule VIIB}} | {{h3|Lobule VIIB}} | ||
| + | |||
| + | Click [[Lobule VIIB|HERE]] for more information. | ||
| + | |||
| + | |||
*Location: Middle region of cerebellum, extends from midsagittal to most lateral boundaries | *Location: Middle region of cerebellum, extends from midsagittal to most lateral boundaries | ||
| − | *Description: | + | *Description: It is best to identify and label the boundaries for VIIIA and VIIAt before VIIB, as this can be difficult to identify otherwise, first identification might best be made in the axial orientation towards the posterior end. |
| − | *This lobule should be trivially defined by the prebiventure fissure (Lobe Definitions) and the boundary for VIIAt (Crus II) | + | *This lobule should be trivially defined by the prebiventure fissure ([[Iacl:Lobe_Definitions|Lobe Definitions]]) and the boundary for VIIAt (Crus II). |
<gallery widths="500" heights="300"> | <gallery widths="500" heights="300"> | ||
| − | image:lobuleVIIB. | + | image:lobuleVIIB.jpg |
| − | image:lobuleVIIB_all. | + | image:lobuleVIIB_all.jpg |
</gallery> | </gallery> | ||
{{h3|Lobule VIIIA}} | {{h3|Lobule VIIIA}} | ||
| + | |||
| + | Click [[Lobule VIIIA|HERE]] for more information. | ||
| + | |||
| + | |||
*Location: Lower regions of the cerebellum, extends from midline laterally | *Location: Lower regions of the cerebellum, extends from midline laterally | ||
| − | *Description: | + | *Description: it is best to identify and label the boundary for VIIIB before VIIIA as the lower boundary can be difficult to identify otherwise. |
| − | **The fissure between this lobule and Lobule VIIA Crus I is easily identified in the midsagittal slice | + | **The fissure between this lobule and Lobule VIIA Crus I is easily identified in the midsagittal slice. |
*This lobule usually consists of one or two white matter branches and its second boundary is characterized by the exclusion of VIIIB which has a distinct curve. | *This lobule usually consists of one or two white matter branches and its second boundary is characterized by the exclusion of VIIIB which has a distinct curve. | ||
| Line 181: | Line 197: | ||
{{h3|Lobule VIIIB}} | {{h3|Lobule VIIIB}} | ||
| + | |||
| + | Click [[Lobule VIIIB|HERE]] for more information. | ||
| + | |||
| + | |||
*Location: Lower most region of the cerebellum in the sagittal orientation | *Location: Lower most region of the cerebellum in the sagittal orientation | ||
| − | ** "Scoops" around the tonsils (hemispheric lobule IX). This can be most appreciated in the sagittal view | + | ** "Scoops" around the tonsils (hemispheric lobule IX). This can be most appreciated in the sagittal view. |
| − | *Description: can be identified as the lobule that curves around lobule IX | + | *Description: It can be identified as the lobule that curves around lobule IX. |
| − | **Notice how this lobule is not located in the midsagittal | + | **Notice how this lobule is not located in the midsagittal. |
<gallery widths="500" heights="300"> | <gallery widths="500" heights="300"> | ||
| Line 192: | Line 212: | ||
{{h3|Lobule IX}} | {{h3|Lobule IX}} | ||
| + | |||
| + | Click [[Lobule IX|HERE]] for more information. | ||
| + | |||
| + | |||
*Location: Lowest portion of the cerebellum in the midsagittal | *Location: Lowest portion of the cerebellum in the midsagittal | ||
| − | *Description: First identification can be made in the midsagittal as the region of the cerebellum that seems to be detached from the main branch (as shown in Figure 71) , after initial identification, the axial view is best for further delineation | + | *Description: First identification can be made in the midsagittal as the region of the cerebellum that seems to be detached from the main branch (as shown in Figure 71) , after initial identification, the axial view is best for further delineation. |
*Best view(s) for delineation: Axial/ Coronal/ Sagittal | *Best view(s) for delineation: Axial/ Coronal/ Sagittal | ||
*It is fastest to delineate in the Coronal view because here it is a straight line instead of a circle. | *It is fastest to delineate in the Coronal view because here it is a straight line instead of a circle. | ||
| Line 203: | Line 227: | ||
{{h3|Lobule X}} | {{h3|Lobule X}} | ||
| + | |||
| + | Click [[Lobule X|HERE]] for more information. | ||
| + | |||
| + | |||
*Location: Within 10 slices to the left and right of the midsagittal along the vermis section, and also the flocculi (anterior portion of the cerebellum) | *Location: Within 10 slices to the left and right of the midsagittal along the vermis section, and also the flocculi (anterior portion of the cerebellum) | ||
*Description: Flocculi best identified in the coronal orientation, anterior most part of the cerebellum located in the center | *Description: Flocculi best identified in the coronal orientation, anterior most part of the cerebellum located in the center | ||
| Line 209: | Line 237: | ||
<gallery widths="500" heights="300"> | <gallery widths="500" heights="300"> | ||
| − | image:lobuleX. | + | image:lobuleX.jpg |
| − | image:lobuleX_all. | + | image:lobuleX_all.jpg |
</gallery> | </gallery> | ||
{{h3|Vermis Lobule VIIIA}} | {{h3|Vermis Lobule VIIIA}} | ||
| + | |||
| + | Click [[Lobules_VIIIA-X_vermis|HERE]] for more information. | ||
| + | |||
| + | |||
*This is the small posterior most part of the vermis and seems to take only half of the posterior most white matter trunk. | *This is the small posterior most part of the vermis and seems to take only half of the posterior most white matter trunk. | ||
| − | *It was the lobule that was present in the most lateral slices of the vermis and appeared to meet lobule XIIIA in the axial plane.It was best delineated in the sagittal plane. | + | *It was the lobule that was present in the most lateral slices of the vermis and appeared to meet lobule XIIIA in the axial plane. It was best delineated in the sagittal plane. |
<gallery widths="500" heights="300"> | <gallery widths="500" heights="300"> | ||
| Line 223: | Line 255: | ||
{{h3|Vermis Lobule VIIIB}} | {{h3|Vermis Lobule VIIIB}} | ||
| + | |||
| + | Click [[Lobules_VIIIA-X_vermis|HERE]] for more information. | ||
| + | |||
| + | |||
*This lobule is the other half of the posterior most white matter branch and is present, laterally, nearly as long as Lobule VIIIA. It was also best delineated in the sagittal plane. | *This lobule is the other half of the posterior most white matter branch and is present, laterally, nearly as long as Lobule VIIIA. It was also best delineated in the sagittal plane. | ||
| Line 231: | Line 267: | ||
{{h3|Vermis Lobule IX}} | {{h3|Vermis Lobule IX}} | ||
| + | |||
| + | Click [[Lobules_VIIIA-X_vermis|HERE]] for more information. | ||
| + | |||
| + | |||
*This lobule is a triangular shape and is bordered on one side by Lobule VIIIB and on the other by X. | *This lobule is a triangular shape and is bordered on one side by Lobule VIIIB and on the other by X. | ||
*It is the largest lobe in the sagittal view of the midline. The border between IX and X is a fissure that reached the CM and can be determined by considering the difference in the branches on either side. It was best delineated in the sagittal plane. | *It is the largest lobe in the sagittal view of the midline. The border between IX and X is a fissure that reached the CM and can be determined by considering the difference in the branches on either side. It was best delineated in the sagittal plane. | ||
| Line 240: | Line 280: | ||
{{h3|Vermis Lobule X}} | {{h3|Vermis Lobule X}} | ||
| + | |||
| + | Click [[Lobules_VIIIA-X_vermis|HERE]] for more information. | ||
| + | |||
| + | |||
*Lobule X is the anterior most lobule of the vermis and contained no fissures. It is present in more lateral slices than lobule IX but only barely. | *Lobule X is the anterior most lobule of the vermis and contained no fissures. It is present in more lateral slices than lobule IX but only barely. | ||
*The fissure separating lobules IX and X often grew as one progressed laterally in the sagittal view, and these lobules would sometime be separated by Lobule IX of the hemisphere. | *The fissure separating lobules IX and X often grew as one progressed laterally in the sagittal view, and these lobules would sometime be separated by Lobule IX of the hemisphere. | ||
| Line 249: | Line 293: | ||
</gallery> | </gallery> | ||
| + | <div style="font-size: 2em; padding: 22pt; margin: auto; font-weight:bold; color: #9f0000">NOTE: This is a preliminary description of a method to identify and delineate the Middle Vermis; it is not final. Before beginning this stage save your work and once you begin save all files with new names.</div> | ||
| + | |||
| + | {{h3|Vermis Lobule VI}} | ||
| + | |||
| + | Click [[Lobules_VI-VIIB_vermis|HERE]] for more information. | ||
| + | |||
| + | |||
| + | *This Lobule of the vermis is best delineated in the axial view. | ||
| + | *It appears first in the uppermost slices of the axial view at the midline and is often a nearly detached circle. | ||
| + | *The lower portion of this lobule of the middle vermis can best be defined in the sagittal view; at the midline the entirety of lobule VI should be vermis and its boundaries with the hemisphere should make anatomical and reasonable sense when considering the anterior portion of this vermis lobule. | ||
| + | *These lateral boundaries should be relatively gradual and located very near the vermis/hemisphere boundaries for the caudal lobules (shich should already be delineated. | ||
| + | |||
| + | <gallery widths="500" heights="300"> | ||
| + | image:lobuleVI_v.jpg | ||
| + | image:lobuleVI_v_all.jpg | ||
| + | </gallery> | ||
| + | |||
| + | {{h3|Vermis Lobule VIIAt}} | ||
| + | |||
| + | Click [[Lobules_VI-VIIB_vermis|HERE]] for more information. | ||
| + | |||
| + | |||
| + | *This Lobule of the vermis is best delineated in the sagittal view. | ||
| + | *The entirity of lobule VIIAt should be labeled as vermis at the midline unless it appear as two detached regions. | ||
| + | *The lateral boundary is best defined by the increasing prominence of posterior region. | ||
| + | *The vermis of lobule VIIAt also ends in roughly the lateral location as the vermis of lobule VI and the caudal lobes. | ||
| + | |||
| + | <gallery widths="500" heights="300"> | ||
| + | image:lobuleVIIat_v.jpg | ||
| + | image:lobuleVIIat_v_all.jpg | ||
| + | </gallery> | ||
| + | |||
| + | {{h3|Vermis Lobule VIIB}} | ||
| + | |||
| + | Click [[Lobules_VI-VIIB_vermis|HERE]] for more information. | ||
| + | |||
| + | |||
| + | *This Lobule of the vermis is also best delineated in the sagittal view. | ||
| + | *It is usually much smaller than the other two lobules of Middle vermis. | ||
| + | *The entirity of lobule VIIB should be labeled as vermis at the midline unless it appear as two detached regions. | ||
| + | *The lateral boundary is best defined by the increasing prominence of posterior region. | ||
| + | *The vermis of lobule VIIB also ends in roughly the lateral location as the vermis of lobule VI, lobule VIIAt, and the caudal lobes. | ||
| + | |||
| + | <gallery widths="500" heights="300"> | ||
| + | image:lobuleVIIB_v.jpg | ||
| + | image:lobuleVIIB_v_all.jpg | ||
| + | </gallery> | ||
{{DEFAULTSORT:{{PAGENAME}}}} | {{DEFAULTSORT:{{PAGENAME}}}} | ||
[[Category:IACL]] | [[Category:IACL]] | ||
[[Category:IACL Cerebellum Pages|Lobule Delineation]] | [[Category:IACL Cerebellum Pages|Lobule Delineation]] | ||
Latest revision as of 00:49, 3 July 2022
Painting conventions
Standard paint colors
- DNE - "Does not exist." There is no such anatomical structure.
Descriptions of All Cerebellar Lobules
Be sure to utilize MIPAV's locking function when delineating these lobules. Try to do them in a clockwise order so that you only have to be concerned with one boundary at a time; and remember to lock the background, and all other labels you are not using. When delineating, save a file of masks without the delineation for the middle vermis.
The following pages contain various lobule screen shots. These screen shots were taken at different sections of the cerebellem in no particular sequence.
Lobules I/II
Click HERE for more information.
- Location: Within 10-12 slices to the left and right of the mid-sagittal in the mid horizontal region
- Description: It is a very thin hair like lobule, best identified in the sagittal orientation as seen below. It is the small thin curve of grey matter bordering the superior cerebellar peduncles and nearly touching the spinal cord.
Lobule III
Click HERE for more information.
- Location: Anterior region of the cerebellum towards the top surface
- Description: It is the first fully visible lobule going clockwise (as shown below), best located in the midsagittal region.
- This lobule usually consists of only one major white matter branch and often ends near the boundaries of the spinal cord.
Lobule IV
Click HERE for more information.
- Location: Top portion of the cerebellum, focused around the midline
- Description: It can first be identified in the midsagittal slice, as the lobule to the left (inwards) of the top most vertical fissure.
- It is bounded on one side by lobule III. On the other the boundary is the most prominent fissure between lobule III and the primary fissure.
Lobule V
Click HERE for more information.
- Location: Top portion of the cerebellum, focused mainly around the midline
- Description: Can first be identified in the midsagittal slice, as the lobule to the right (outwards) of the top most fissure.
- If you have already defined the primary fissure (Lobe Definitions) and lobule IV then this definition should be trivial.
Lobule VI
Click HERE for more information.
- Location: Spans almost entire cerebellum, except the far lateral sides
- Description: One boundary is easily identifiable in the midsagittal region as there is a clear, wide fissure separating lobules V and VI (this should already be defined).
- On the other side it is bounded by VIIAf and VIIAt. The best way to see this boundary is to begin at the mid-line of the sagittal view and travel laterally about 15mm. You should see lobule VIIAf, which is not usually present in the midline grow in prominence. This is the second boundary for lobule VI and can be followed laterally in the sagittal view. When delineating the mid line maintain the already established anatomical boundary.
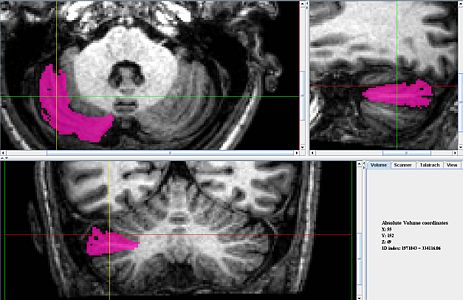
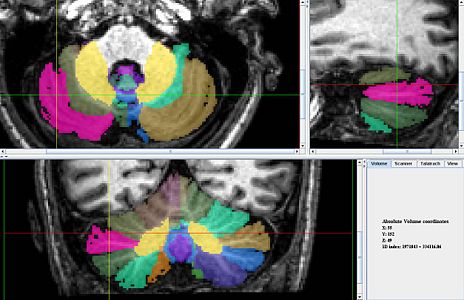
Lobule VIIAf - Crus I
Click HERE for more information.
- Location: Spans entire cerebellum except for a few slices around the midsagittal
- Description: It is best to initially identify from the most lateral edges (Figure 53) and the most posterior axial slice.
- Notice how this lobule is not in the midsagittal slice
- This lobule can also be identified in the sagittal plane as the lobule that is not present at the mid-line but becomes easily discernible roughly 15 mm from the mid-line. It is usually one branch at first that may become two or more at the lateral edges. It should dominate the lateral portion of the cerebellum.
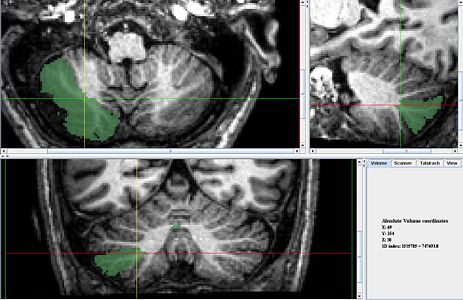
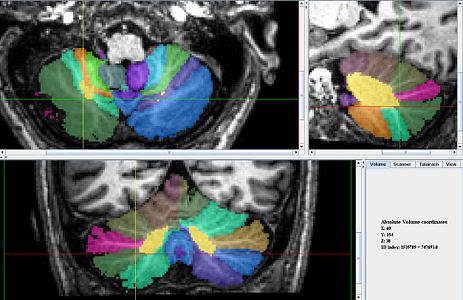
Lobule VIIAt - Crus II
Click HERE for more information.
- Location: Spans entire cerebellum about middle of the sagittal orientation
- Description: This lobule can first be identified and painted in the midsagittal and then the paint can be propagated laterally, it can also be seen in the posterior axial slices.
- In the midsagittal region, there is an easy to define fissure separating this lobule and Lobule VIIIA.
- This fissure is primarily defined by the most dominate fissure between VIIAf and the prebiventure fissure, however determining which fissure qualifies can be difficult. Be patient and consider all perspectives and relavent regions of the scan in order to make the best decision possible.
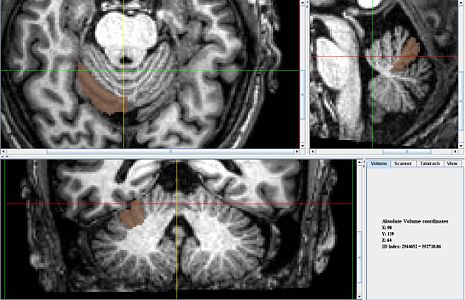
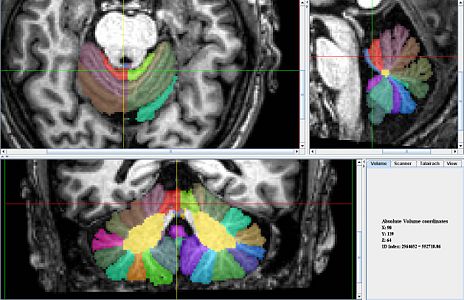
Lobule VIIB
Click HERE for more information.
- Location: Middle region of cerebellum, extends from midsagittal to most lateral boundaries
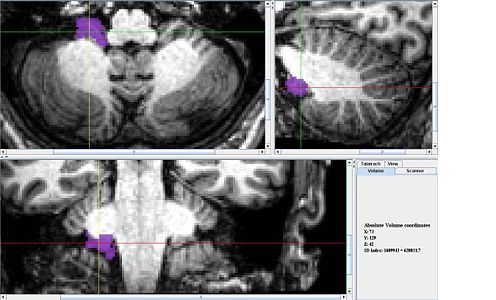
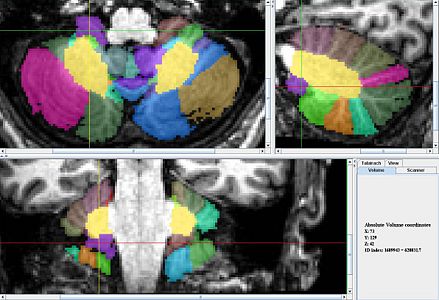
- Description: It is best to identify and label the boundaries for VIIIA and VIIAt before VIIB, as this can be difficult to identify otherwise, first identification might best be made in the axial orientation towards the posterior end.
- This lobule should be trivially defined by the prebiventure fissure (Lobe Definitions) and the boundary for VIIAt (Crus II).
Lobule VIIIA
Click HERE for more information.
- Location: Lower regions of the cerebellum, extends from midline laterally
- Description: it is best to identify and label the boundary for VIIIB before VIIIA as the lower boundary can be difficult to identify otherwise.
- The fissure between this lobule and Lobule VIIA Crus I is easily identified in the midsagittal slice.
- This lobule usually consists of one or two white matter branches and its second boundary is characterized by the exclusion of VIIIB which has a distinct curve.
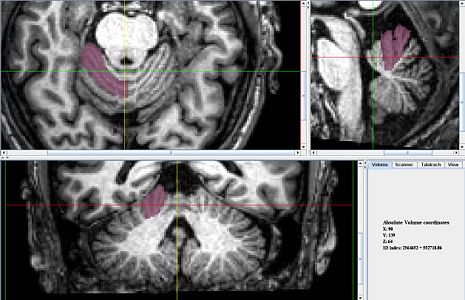
Lobule VIIIB
Click HERE for more information.
- Location: Lower most region of the cerebellum in the sagittal orientation
- "Scoops" around the tonsils (hemispheric lobule IX). This can be most appreciated in the sagittal view.
- Description: It can be identified as the lobule that curves around lobule IX.
- Notice how this lobule is not located in the midsagittal.
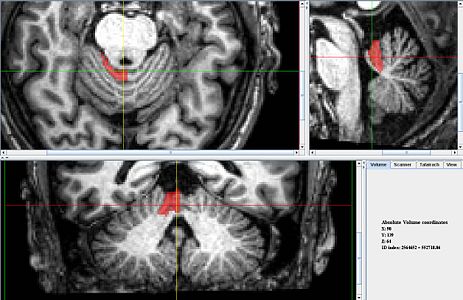
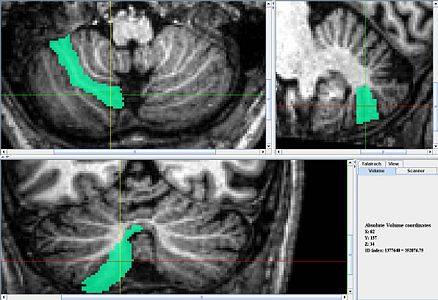
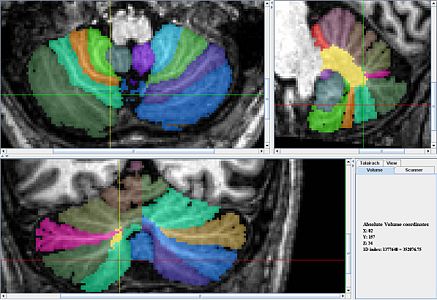
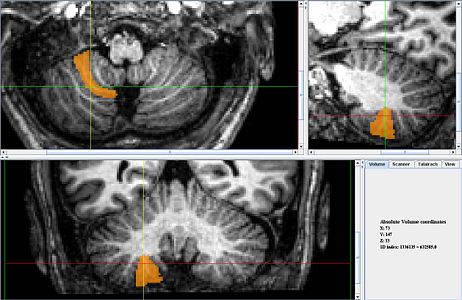
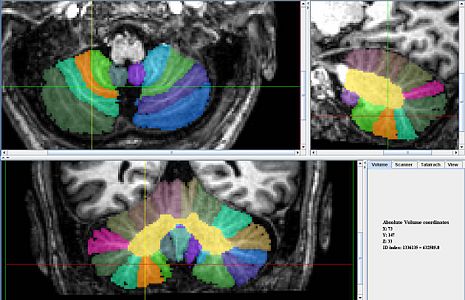
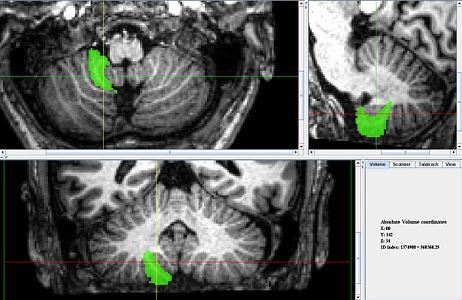
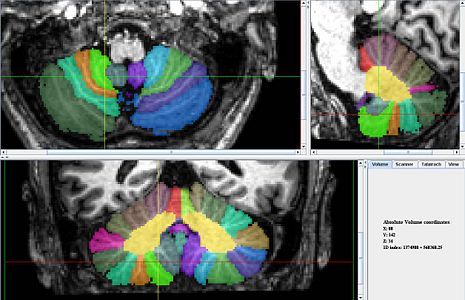
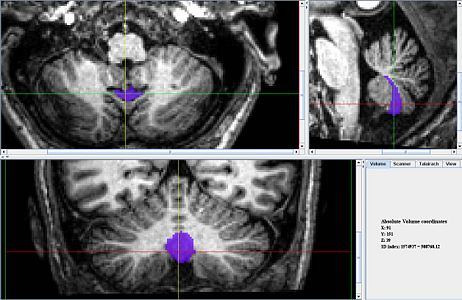
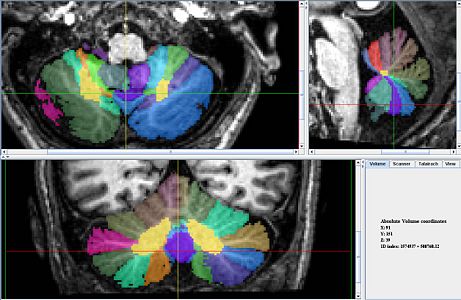
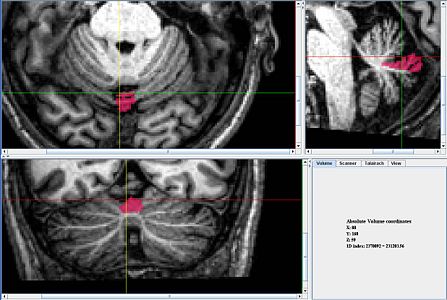
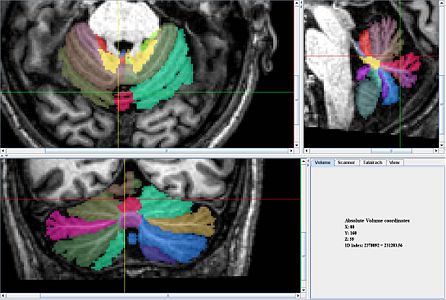
Lobule IX
Click HERE for more information.
- Location: Lowest portion of the cerebellum in the midsagittal
- Description: First identification can be made in the midsagittal as the region of the cerebellum that seems to be detached from the main branch (as shown in Figure 71) , after initial identification, the axial view is best for further delineation.
- Best view(s) for delineation: Axial/ Coronal/ Sagittal
- It is fastest to delineate in the Coronal view because here it is a straight line instead of a circle.
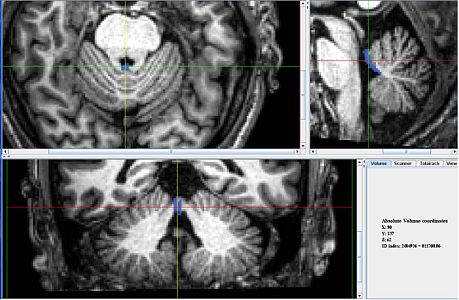
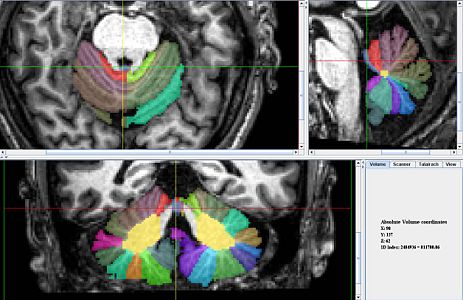
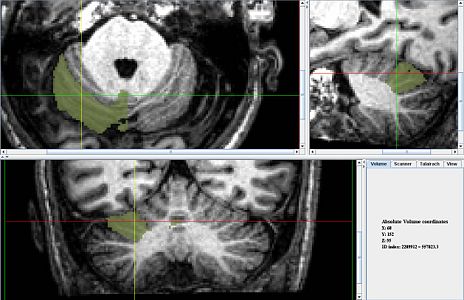
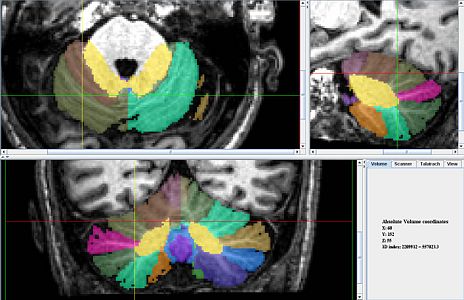
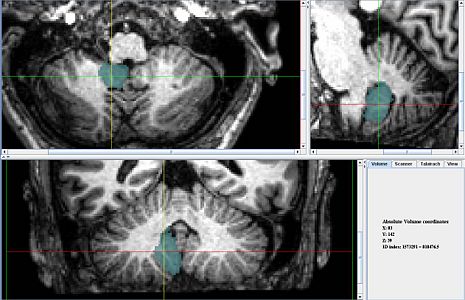
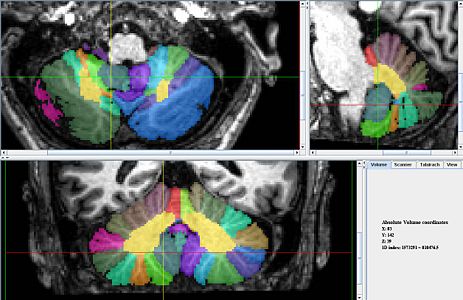
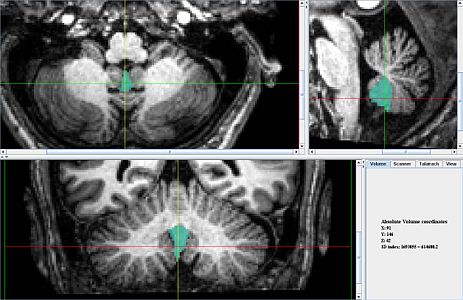
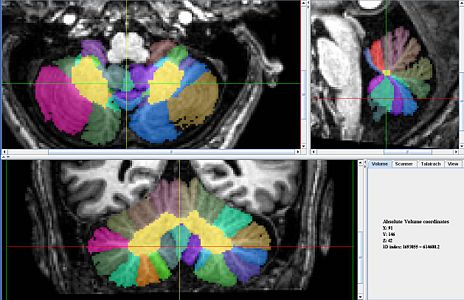
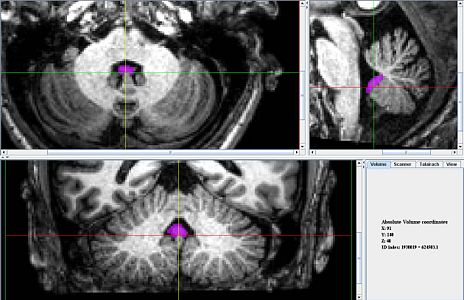
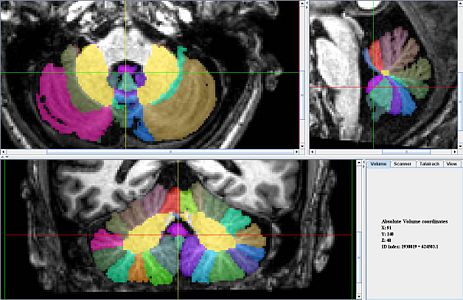
Lobule X
Click HERE for more information.
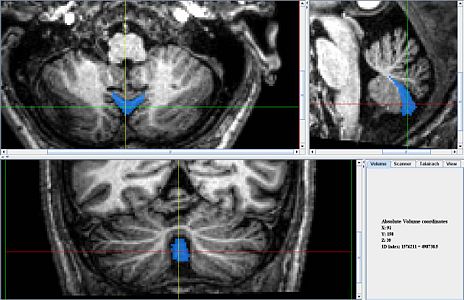
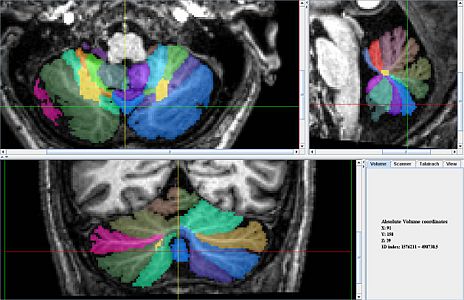
- Location: Within 10 slices to the left and right of the midsagittal along the vermis section, and also the flocculi (anterior portion of the cerebellum)
- Description: Flocculi best identified in the coronal orientation, anterior most part of the cerebellum located in the center
- Best view(s) for delineation*: Axial/ Sagittal/ Coronal for the flocculi
- It is the most anterior and shortest of the gray matter in the sagittal view but is not present throughout.
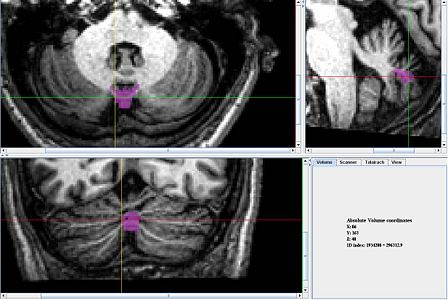
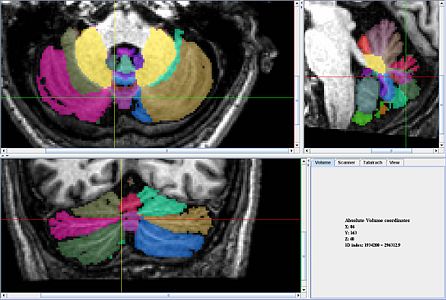
Vermis Lobule VIIIA
Click HERE for more information.
- This is the small posterior most part of the vermis and seems to take only half of the posterior most white matter trunk.
- It was the lobule that was present in the most lateral slices of the vermis and appeared to meet lobule XIIIA in the axial plane. It was best delineated in the sagittal plane.
Vermis Lobule VIIIB
Click HERE for more information.
- This lobule is the other half of the posterior most white matter branch and is present, laterally, nearly as long as Lobule VIIIA. It was also best delineated in the sagittal plane.
Vermis Lobule IX
Click HERE for more information.
- This lobule is a triangular shape and is bordered on one side by Lobule VIIIB and on the other by X.
- It is the largest lobe in the sagittal view of the midline. The border between IX and X is a fissure that reached the CM and can be determined by considering the difference in the branches on either side. It was best delineated in the sagittal plane.
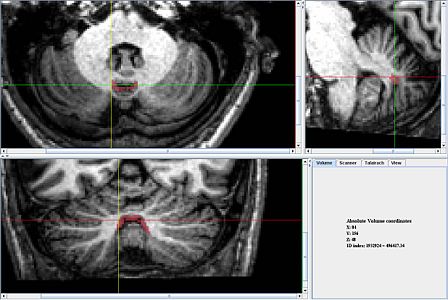
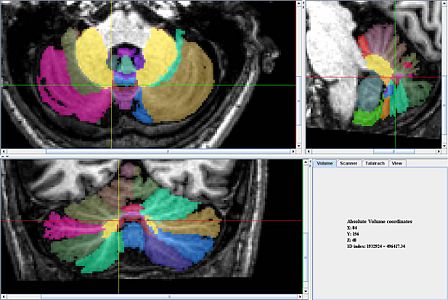
Vermis Lobule X
Click HERE for more information.
- Lobule X is the anterior most lobule of the vermis and contained no fissures. It is present in more lateral slices than lobule IX but only barely.
- The fissure separating lobules IX and X often grew as one progressed laterally in the sagittal view, and these lobules would sometime be separated by Lobule IX of the hemisphere.
- Lobule X of the vermis is disjoint from lobule X of the hemisphere. This was also best delineated in the sagittal view.
Vermis Lobule VI
Click HERE for more information.
- This Lobule of the vermis is best delineated in the axial view.
- It appears first in the uppermost slices of the axial view at the midline and is often a nearly detached circle.
- The lower portion of this lobule of the middle vermis can best be defined in the sagittal view; at the midline the entirety of lobule VI should be vermis and its boundaries with the hemisphere should make anatomical and reasonable sense when considering the anterior portion of this vermis lobule.
- These lateral boundaries should be relatively gradual and located very near the vermis/hemisphere boundaries for the caudal lobules (shich should already be delineated.
Vermis Lobule VIIAt
Click HERE for more information.
- This Lobule of the vermis is best delineated in the sagittal view.
- The entirity of lobule VIIAt should be labeled as vermis at the midline unless it appear as two detached regions.
- The lateral boundary is best defined by the increasing prominence of posterior region.
- The vermis of lobule VIIAt also ends in roughly the lateral location as the vermis of lobule VI and the caudal lobes.
Vermis Lobule VIIB
Click HERE for more information.
- This Lobule of the vermis is also best delineated in the sagittal view.
- It is usually much smaller than the other two lobules of Middle vermis.
- The entirity of lobule VIIB should be labeled as vermis at the midline unless it appear as two detached regions.
- The lateral boundary is best defined by the increasing prominence of posterior region.
- The vermis of lobule VIIB also ends in roughly the lateral location as the vermis of lobule VI, lobule VIIAt, and the caudal lobes.
